

Introduction
While mastering the top 10 rules of composition in photography is essential for capturing great images in-camera, the photographic process doesn't end when you press the shutter button. Post-processing offers a powerful second chance to refine and sometimes completely transform the composition of your photographs. Whether you're looking to make subtle adjustments or rescue an otherwise great shot with compositional flaws, understanding how to use post-processing tools effectively can elevate your photography to new levels.
In this extended guide, we'll explore how post-processing techniques can enhance compositional elements, allowing you to create stronger, more impactful images even after the moment of capture has passed. From basic cropping to advanced selective editing, these techniques provide photographers with incredible flexibility to perfect their vision during the editing stage.
Why Post-Processing Matters for Composition
Even the most skilled photographers don't always achieve perfect composition in-camera. Moving subjects, challenging lighting conditions, or simply the rush of the moment can lead to compositional compromises. Post-processing provides a valuable opportunity to:
- Refine the implementation of compositional rules
- Remove distracting elements that weren't noticed during shooting
- Enhance the visual flow and balance of the image
- Direct the viewer's attention more effectively
- Transform good photographs into exceptional ones
Let's dive into the specific post-processing techniques that can help you achieve better composition in your photographs.
1. Cropping: The Ultimate Compositional Tool
How Cropping Enhances Composition
Cropping is perhaps the most powerful and frequently used post-processing technique for improving composition. It allows you to:
- Reframe your image to better apply the Rule of Thirds
- Remove distracting elements near the edges of the frame
- Create a more balanced distribution of visual weight
- Change the aspect ratio to better suit the subject
- Tighten the composition to emphasize the main subject
Effective Cropping Techniques
When cropping for better composition, consider these approaches:
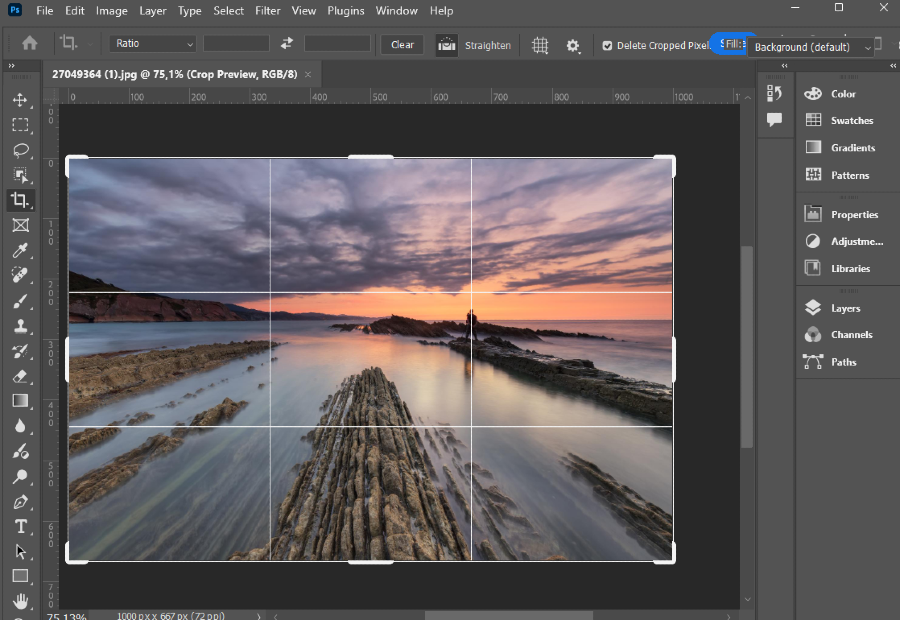
Applying the Rule of Thirds: Use the crop overlay grid in your editing software to place key elements along the third lines or at their intersections. Most editing programs offer the Rule of Thirds, the Golden Ratio, and other compositional guides as overlay options.
Creating Better Balance: Crop to redistribute visual weight more effectively throughout the frame. This might mean removing empty space on one side or trimming excess elements to create a more harmonious balance.
Changing Perspective: Sometimes a square crop works better than the original 3:2 or 4:3 ratio. Experiment with different aspect ratios to see what best complements your subject and desired mood.
Tip: Always maintain a high enough resolution for your intended output. Avoid excessive cropping that might reduce image quality for your desired print size or display medium.
2. Perspective Correction: Straighten and Transform
Fixing Compositional Distortions
Perspective issues can significantly impact composition, particularly in architectural and landscape photography. Post-processing offers several ways to address these problems:
Horizon Straightening: A tilted horizon is one of the most common compositional flaws. Most editing software offers straightening tools that make leveling the horizon quick and easy.
Vertical Perspective Correction: When photographing tall buildings, vertical lines often converge. Using the transform or perspective correction tools, you can make these lines parallel again, creating a more natural and balanced composition.
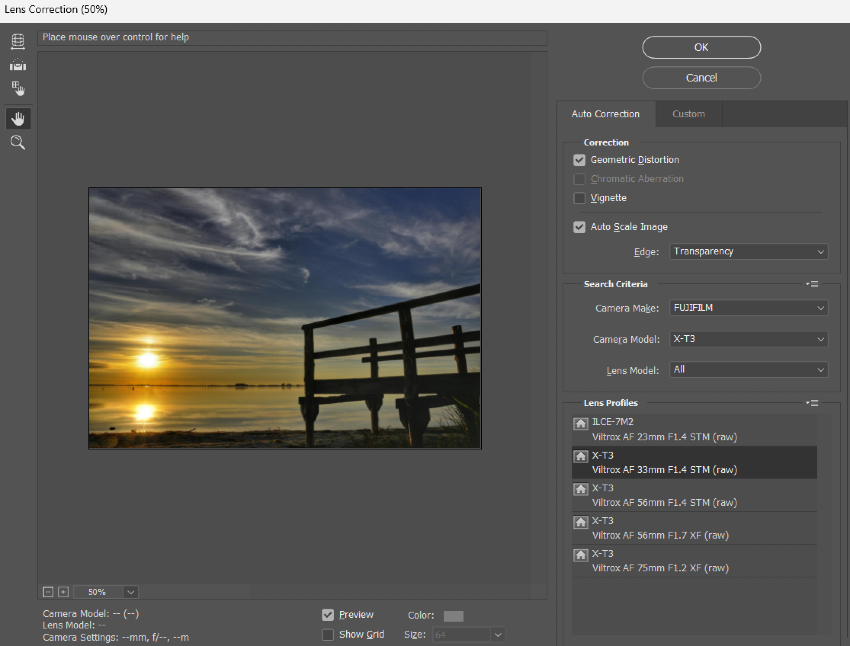
Lens Distortion Removal: Wide-angle lenses can create distortion that affects composition. Lens correction profiles in editing software can automatically fix these issues, restoring more natural proportions and improving compositional balance.
Implementation Tips
- Use the grid overlay in your editing software to ensure lines are truly straight
- Apply perspective corrections before cropping, as these adjustments often change the frame's dimensions
- Make incremental adjustments rather than extreme corrections to maintain a natural look
- Consider whether some perspective effects might actually enhance rather than detract from your composition
3. Selective Adjustments: Directing Attention
Using Light and Contrast to Guide the Eye
One of the most powerful aspects of post-processing is the ability to make selective adjustments that direct the viewer's attention within your composition. These techniques allow you to:
Enhance Leading Lines: Increase contrast or clarity along leading lines to strengthen their directional pull toward your subject.
Create Visual Hierarchy: Brighten your main subject while subtly darkening less important areas to establish a clear focal point.
Control the Visual Flow: Use gradients and selective adjustments to create a path for the viewer's eye to follow through your composition.
Techniques for Selective Adjustments
Dodging and Burning: These traditional darkroom techniques, now available in digital editing, involve selectively lightening (dodging) or darkening (burning) specific areas of your image to create emphasis and guide attention.
Radial and Graduated Filters: These tools allow you to apply adjustments to specific areas of your image. A radial filter can highlight your subject by brightening it or darkening the surrounding area, while graduated filters can balance exposure between sky and foreground in landscapes.
Adjustment Brushes: For precise control, use adjustment brushes to paint exposure, contrast, or clarity adjustments exactly where needed to strengthen compositional elements.
Tip: Make subtle adjustments that look natural. Heavy-handed selective editing can create an artificial look that distracts rather than enhances.
4. Color Adjustments for Compositional Impact
Implementation Strategies
- Use the HSL (Hue, Saturation, Luminance) panel to target specific colors
- Consider selective desaturation to minimize distracting elements
- Create color cohesion by slightly shifting colors toward a unified palette
- Use split toning or color grading to create a mood that complements your composition
5. Removing Distractions: Cleaning Up Compositional Flaws
Eliminating Elements That Break Composition
Sometimes, perfect composition is hindered by unwanted elements that couldn't be avoided during shooting. Post-processing provides several solutions:
Content-Aware Removal: Many editing programs offer sophisticated tools that can remove distracting elements while intelligently filling in the space with appropriate content based on the surrounding areas.
Clone Stamping: For more precise control, clone stamping allows you to replace distracting elements with pixels from another area of the image.
Spot Healing: Quick removal of small distractions like sensor spots, small objects, or blemishes that might pull attention away from your main subject.
Best Practices for Distraction Removal
- Focus on removing elements that draw attention away from your subject
- Maintain realism and authenticity in your edits
- Consider whether the "distraction" might actually add contextual value
- Make these edits early in your workflow, as they may affect other adjustments
6. Vignetting: Framing Within the Frame
Using Light to Create Focus
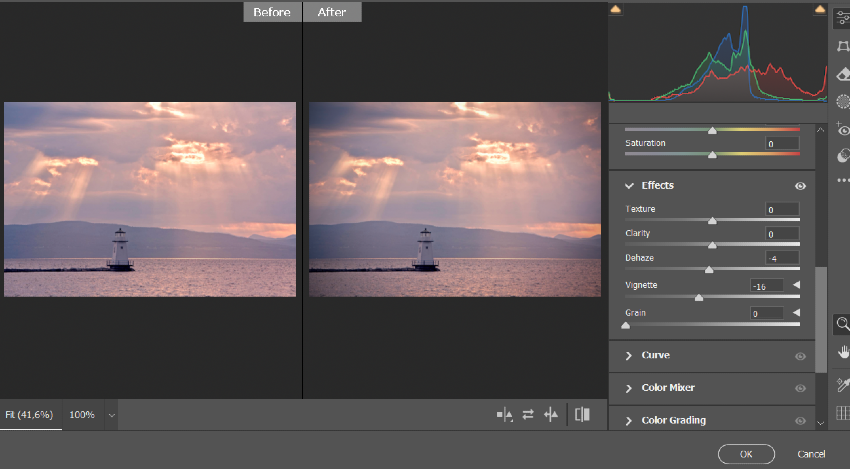
Vignetting—the gradual darkening toward the edges of an image—can be a powerful compositional tool when applied purposefully in post-processing:
Subtle Vignettes: A gentle darkening around the edges can prevent the viewer's eyes from wandering out of the frame and direct attention inward toward your subject.
Creative Vignettes: Non-circular vignettes or graduated darkening can be used to emphasize specific compositional structures within your image.
Reverse Vignettes: Lightening the center of the image relative to the edges creates a spotlight effect that can strengthen central composition.
Application Tips
- Keep vignettes subtle unless a dramatic effect is specifically desired
- Adjust the feathering to ensure gradual, natural-looking transitions
- Consider the shape and position of your vignette in relation to your subject
- Use radial filters for off-center vignetting that emphasizes subjects away from the center
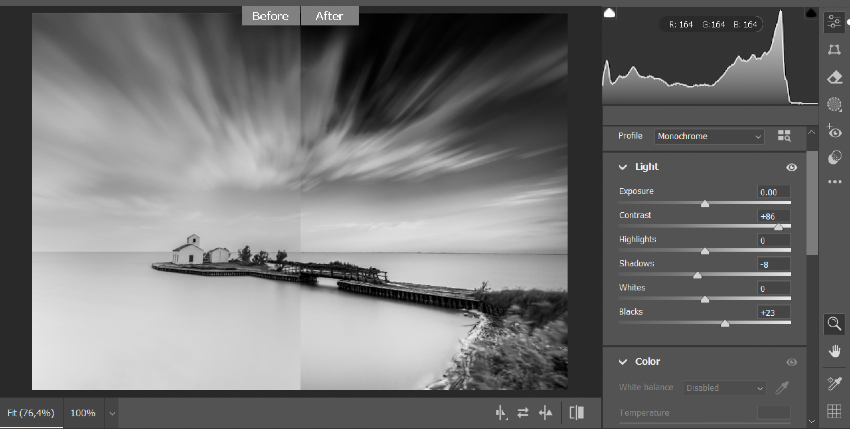
7. Transforming to Black and White: Composition Through Contrast
Simplifying Visual Relationships
Converting an image to black and white can dramatically change its compositional impact by:
- Eliminating the distraction of color to focus attention on shapes, lines, and textures
- Creating a stronger contrast between elements
- Simplifying complex scenes into more coherent compositions
- Emphasizing structural elements like leading lines and patterns
Optimizing Black and White Conversions for Composition
Channel Mixing: Rather than a simple desaturation, use black and white conversion tools that allow you to control how each color translates to grayscale. This gives you tremendous control over the tonal relationships in your final image.
Contrast Adjustments: In black and white images, contrast becomes even more important for defining compositional elements. Careful use of contrast can make or break your composition.
Clarity and Texture: Without color, these elements become more prominent. Selective clarity adjustments can emphasize important textural elements that strengthen your composition.
8. Compositing: Advanced Compositional Control
Creating What Couldn't Be Captured
For situations where the perfect composition was impossible to capture in a single shot, compositing offers solutions:
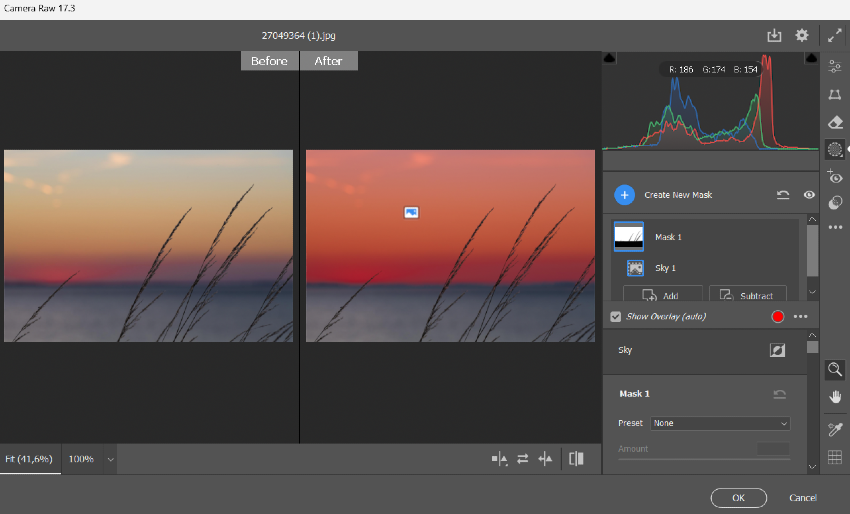
Sky Replacement: Replace a dull sky with one that better balances your composition or adds dramatic elements that complement your subject.
Focus Stacking: Combine multiple images taken at different focus points to achieve perfect sharpness throughout your composition, particularly useful in macro and landscape photography.
Exposure Blending: Merge multiple exposures to balance light and shadow in ways that strengthen compositional relationships and prevent viewer distraction due to improper exposure.
Ethical Considerations
While compositing offers powerful compositional tools, consider:
- Maintaining transparency about heavily manipulated images
- Respecting the context and authenticity expectations of your genre
- Using compositing to enhance rather than fabricate reality
- Following any relevant guidelines for competitions or publications
9. Creating Panoramas: Expanding Compositional Possibilities
Stitching for Impact
Panoramic stitching allows you to create compositions that wouldn't be possible with a single shot:
Wider Field of View: Capture expansive scenes that tell a more complete story than a standard frame would allow.
Higher Resolution: Combine multiple images for incredibly detailed, large prints while maintaining compositional integrity.
Creative Aspect Ratios: Create unusual aspect ratios that might better suit specific subjects and compositional approaches.
Effective Implementation
- Plan your panorama shots with an overlap between frames
- Use consistent exposure settings across all images
- Consider the final composition when shooting the individual frames
- Use editing software with sophisticated stitching capabilities for seamless results

10. Saving Alternative Compositions
Preserving Creative Options
One advantage of digital editing is the ability to save multiple versions of your composition:
Virtual Copies: Create non-destructive variations with different crops and compositions.
Export Multiple Versions: Save different compositional interpretations for different uses or to evaluate which works best over time.
Develop Your Eye: Compare different compositional choices to train yourself to see more possibilities in-camera for future shoots.
Conclusion: The Balance Between In-Camera and Post-Processing
While post-processing offers powerful tools for refining composition, it works best as a complement to—not a replacement for—good in-camera technique. The most successful photographers develop both skills: composing thoughtfully at the moment of capture and then using post-processing to enhance and perfect that initial vision.
By mastering these post-processing techniques for better composition, you'll have more flexibility and creative control throughout your photographic workflow. Remember that subtlety is often key—the best post-processing enhancements are those that strengthen your composition without calling attention to the editing itself.
What compositional challenges do you typically address in post-processing? Share your thoughts and questions in the comments below, and don't forget to check out our guide to the top 10 rules of composition in photography for essential techniques to use when capturing your images.