

The Invisible Maths Behind Every Great Photo
Before a photographer ever presses the shutter, a quiet series of calculations has already taken place. Most of them happen instinctively, formed through years of practice until they feel like second nature. But beneath every creative decision — every choice of aperture, every frame composition, every print order accepted or declined — there is a layer of precision that separates guesswork from mastery.
This is the daily reality of a working photographer, and it begins long before the camera comes out of the bag.
Morning: Planning the Shoot
A photographer's morning often starts not with a camera, but with a brief — a portrait session at 9 a.m., a product shoot at noon, a landscape outing at golden hour. Each assignment carries its own set of optical challenges, and an experienced photographer thinks through them before leaving the house.
Which lens for a portrait? The classic answer is something in the 85–135 mm full-frame equivalent range — long enough to compress perspective and flattering for faces, short enough to allow comfortable working distances indoors. But if you're shooting APS-C, that changes everything. A 50 mm on a Canon APS-C body behaves like 80 mm. A 35 mm behaves like 56 mm. These are not trivial differences when you're trying to achieve a specific look.
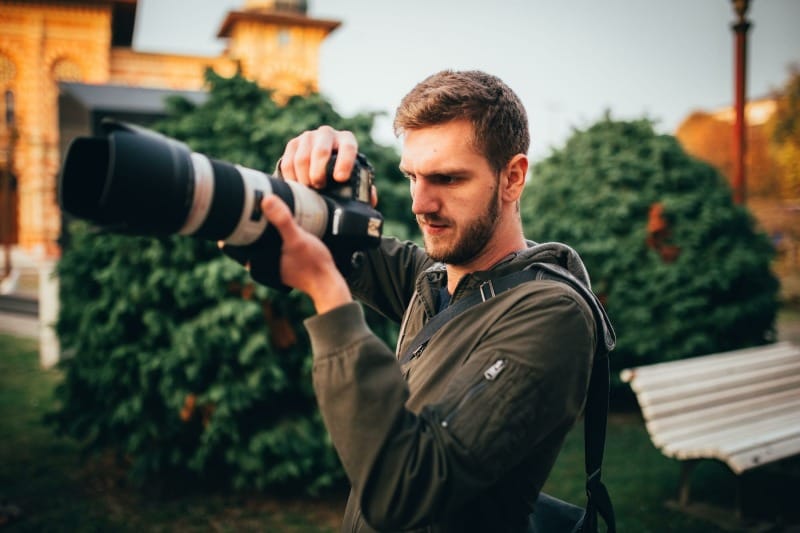
What aperture will give the right depth of field? For a head-and-shoulders portrait at 3 meters, f/1.8 on an 85 mm lens creates a razor-thin plane of focus — beautiful background separation, but both eyes must be at exactly the same distance from the sensor, or one will slip soft. Stop down to f/2.8 and you gain a little breathing room. f/5.6 and the whole face is crisp. These decisions shape the image before a single frame is captured.
Will the light be enough? A landscape at golden hour might look warm and romantic on Instagram, but the actual light levels — especially in the shadow zones — can be brutally low. A photographer planning to shoot at f/11 for maximum depth of field needs to know what ISO and shutter speed that demands, and whether the shutter will be fast enough to avoid camera shake or motion blur in the foliage.
On Location: Real-Time Decisions Under Pressure
Once on location, the photographer's brain is running several parallel processes at once. Reading the light. Communicating with a subject. Watching the background for distractions. Adjusting composition. And underneath all of that, continuously evaluating the exposure triangle.
The exposure triangle — ISO, aperture, and shutter speed — is the foundational relationship in all of photography. Change one value and the others must compensate. Raise ISO to handle a darker scene and you introduce digital noise. Open the aperture to let in more light and you lose depth of field. Slow the shutter to compensate for a closed aperture and moving subjects blur. There is no free lunch, and the most experienced photographers are constantly aware of which compromise they're making at any given moment.
In fast-moving environments — a wedding, a sports event, street photography — these decisions must happen in fractions of a second. But in slower, more deliberate work — architecture, landscape, studio portraiture — there's time to think carefully. And thinking carefully means checking your numbers.
A common question heard on location: "Is my hyperfocal distance far enough to keep the foreground and background both sharp?" The hyperfocal distance is the closest focusing point at which everything from half that distance to infinity remains acceptably sharp. It's the landscape photographer's most powerful tool. But calculating it mentally — accounting for focal length, aperture, and the circle of confusion for your specific sensor — is not trivial without a reference.
Post-Shoot: The Print Problem
The work doesn't end when the shutter clicks. For many photographers, one of the most frequent — and most consequential — daily decisions involves print sizing.
A client wants to order a 60 × 90 cm canvas print. The photographer needs to know, before saying yes, whether their file can support that size at an acceptable resolution. A 24-megapixel file sounds impressive, but at 300 DPI — the standard for photo lab printing — a 6000 × 4000 pixel image maxes out at roughly 50 × 34 cm. For a 60 × 90 canvas, the photographer would need to either shoot at higher resolution, use an AI upscaler, or advise the client that the print will be viewed from a distance where DPI matters less.
Getting this wrong is expensive. Sending a file with insufficient resolution to a print lab — only to receive a soft, disappointing print that the client rejects — costs both money and professional reputation. Getting it right, every time, requires knowing your numbers before you commit.
The real cost of guessing: Reprints, client disappointment, wasted lab fees, and damaged trust. Professional photographers don't guess on print resolution — they calculate it.
The Questions That Come Up Every Single Day
Whether you're a seasoned professional or an enthusiastic amateur building your skills, these are the decisions that come up on virtually every shoot — often multiple times:
- What depth of field will this aperture give me at this distance, on this sensor?
- What is my hyperfocal distance for this lens and f-stop combination?
- Can my image file support a print at this size and this DPI?
- What is my exposure value, and what scene type does it suggest?
- How much noise will this ISO produce? Is my shutter fast enough to freeze motion?
- What full-frame equivalent focal length is this lens on my crop-sensor body?
- Is this focal length appropriate for what I'm trying to shoot?
Until recently, answering these questions accurately meant either memorising complex formulas, carrying reference cards, or hunting through apps that required an internet connection and a cluttered interface. There had to be a better way.
Four Calculators. Every Answer. Instantly.
The Photography Pro Calculators bundle from Photo Image Planet was built to answer exactly those questions — quickly, accurately, and without the need for an internet connection or a subscription. It's a single HTML file you download once, open in any browser, and use forever.
No app store. No account. No ads. No loading spinners. Just four precision tools that update their results the instant you change any value.
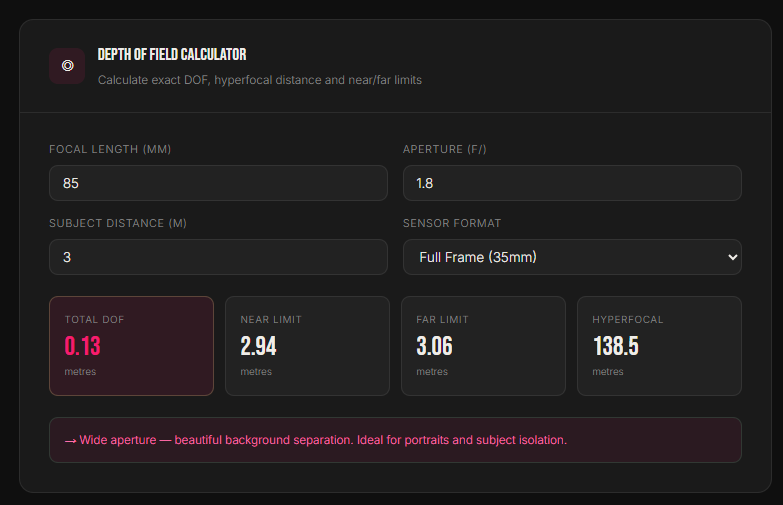
◎ 1 — Depth of Field Calculator
Enter your focal length, aperture, subject distance, and sensor format. The calculator instantly returns your total depth of field, the near and far focus limits, and your hyperfocal distance — all in meters.
Inputs:
| Field | What to enter |
|---|---|
| Focal length | The number on your lens, e.g. 85 mm |
| Aperture | Your f-number, e.g. f/1.8 for portraits, f/8 for landscapes |
| Subject distance | Camera sensor to subject, in metres |
| Sensor format | Full Frame, APS-C Canon, APS-C Sony/Nikon, or Micro Four Thirds |
Outputs: Total DOF · Near limit · Far limit · Hyperfocal distance — all in meters
Why it matters: Portrait photographers use it to confirm that both eyes will be sharp at a chosen aperture. Landscape photographers use the hyperfocal result to nail front-to-back sharpness without trial and error. Group photographers use it to ensure the depth of field covers the full row of subjects.
⬜ 2 — Print Size & DPI Calculator
Enter your image dimensions in pixels, choose your target DPI and preferred unit (inches or centimeters), and the calculator tells you the maximum print size your file supports — along with a plain-English quality rating.
DPI guide:
| DPI | Best used for |
|---|---|
| 300 DPI | Photo lab prints, fine art giclée |
| 240 DPI | Epson inkjet printers |
| 150 DPI | Large-format, trade banners (viewed from a distance) |
| 72 DPI | Screen and web display only — never for print |
Why it matters: Before you promise a client a large canvas, open this tool. A 24 MP file prints beautifully at A3. For a gallery-wall canvas at 80 cm wide, you need to check first. The quality rating — Excellent, Good, or Low — gives you an honest answer before it becomes an expensive mistake.
◐ 3 — Exposure Triangle Calculator
Choose your ISO, aperture, and shutter speed from the dropdowns. The calculator returns your Exposure Value in stops, an estimated scene type, your noise risk level, and your motion-blur risk — all updated instantly.
Inputs: ISO 100 to 25,600 · Aperture f/1.2 to f/22 · Shutter speed 1/8000s to 1s
Why it matters: Invaluable when learning manual exposure and when working in challenging or unfamiliar light. It also makes an outstanding teaching aid — projecting it during a workshop makes the exposure triangle tangible in a way no diagram can replicate.
Example: ISO 6400, f/2.8, 1/60s — the calculator flags high noise risk and medium motion-blur risk, and estimates a low-light scene. That's your cue to either widen the aperture, accept the noise trade-off, or reach for a tripod.
⟨ ⟩ 4 — Focal Length & Crop Factor Calculator
Enter your lens focal length and sensor format. The calculator tells you the full-frame equivalent focal length, your crop factor, the horizontal angle of view in degrees, and a suitability rating for five shooting scenarios.
Ideal full-frame equivalent ranges:
| Scenario | Ideal FF equivalent |
|---|---|
| Portrait | 70–135 mm |
| Street / Documentary | 28–50 mm |
| Landscape / Architecture | 14–35 mm |
| Wildlife / Sports | 200–600 mm |
| Macro | 90–180 mm |
Why it matters: If you shoot with a crop-sensor body and are used to thinking in full-frame terms — or if you're adapting vintage glass — this tool removes all the mental arithmetic. It also helps when switching between camera systems and needing to replicate a field of view that works for a particular client or style.
Watch the Full Walkthrough
The video below walks through every calculator in detail — showing exactly what each input does, how to read the results, and real-world examples of when to reach for each tool.
Photography Pro Calculators — Full Tutorial · Photo Image Planet
One file · Works offline · No subscription
Who Is This For?
The Photography Pro Calculators bundle was designed for photographers who take their craft seriously — but it's equally useful across a wide range of experience levels:
- Portrait photographers who need to nail depth of field and focal length choices for every session
- Landscape and travel photographers who rely on hyperfocal distance for front-to-back sharpness
- Commercial and product photographers who regularly quote clients on print sizes and need accurate DPI calculations
- Photography educators and workshop leaders who need live, visual tools to demonstrate the exposure triangle and crop factor
- Hobbyists and enthusiasts building a deeper understanding of their camera and lenses
- Anyone switching camera systems and needing to translate lens specs across sensor formats

Frequently Asked Questions
Does it work offline? Yes. The app is a single self-contained HTML file. Once downloaded, it works in any browser with no internet connection required. Only the typeface loads from Google Fonts — if you're offline, the browser falls back to a system font and everything else works identically.
Which browsers are supported? Chrome, Edge, Firefox, and Safari — on both desktop and mobile. The layout adapts automatically for smaller screens, with the four tool buttons stacking into two columns.
Do I need to press a Calculate button? No. All four calculators update their results instantly as you type or change any dropdown. There is no Calculate button — the outputs are always live and current.
How accurate is the Depth of Field calculator? The DOF calculator uses the standard circle-of-confusion values for each sensor format — the same values used by professional optical calculation software. Results are accurate to two decimal places in meters. Full Frame CoC is 0.029 mm · APS-C Canon 0.019 mm · APS-C Sony/Nikon 0.0196 mm · Micro Four Thirds 0.015 mm.
Can I use this on my phone during a shoot? Absolutely. Open the HTML file on your phone browser or save it to your home screen, and it works as a lightweight on-location reference tool with no app store required.
What sensor formats are supported? Full Frame (35mm), APS-C Canon (1.6× crop), APS-C Sony/Nikon (1.5× crop), Micro Four Thirds (2× crop), and 1-inch sensor (2.7× crop) in the Focal Length calculator.
Ready to shoot with precision?
Four calculators. One file. Works offline on any device, forever.
Get the Photography Pro Calculators →Available now at pipdownload.com
© 2026 Photo Image Planet · photoimageplanet.com